Meta Description:
Learn how to clean up C Drive in Windows 11 safely and easily. Discover the best PC cleanup tools, free PC cleaner software, and simple ways to remove junk files, optimize your PC, and speed up Windows for better performance.
Introduction
Is your Windows 11 computer running slower than usual? Do you keep getting the “Low Disk Space” warning on your C Drive? You’re not alone! Over time, your computer collects junk files, cache, old updates, and temporary files that fill up valuable space on the C Drive.
When your C Drive gets too full, your PC struggles to perform tasks efficiently — it slows down, takes longer to start, and even crashes sometimes.
The good news? You can clean up your C Drive in Windows 11 quickly using built-in tools or a PC clean software. In this step-by-step guide, you’ll learn how to remove junk files, optimize your PC, and make Windows run faster — even if you’re not tech-savvy!
Why Cleaning Your C Drive Matters
The C Drive is where Windows stores your operating system, apps, and essential system files. When it gets overloaded with unnecessary files, your PC performance takes a hit.
Here’s what happens when the C Drive is full:
- Windows updates may fail to install.
- Applications take longer to open.
- You get frequent “disk full” warnings.
- Your PC may freeze or lag.
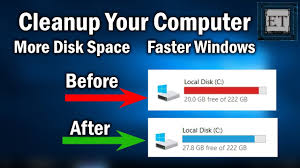
By cleaning your C Drive regularly, you can:
- Speed up your PC (Windows 11) performance.
- Free up valuable space for important files.
- Keep your system healthy and organized.
Step 1: Use the Built-in Disk Cleanup Tool
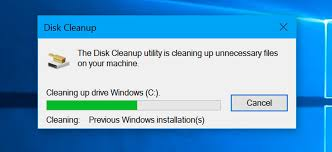
Windows 11 comes with a handy tool called Disk Cleanup that removes temporary and system files easily.
Here’s how to use it:
- Press Windows + S and type Disk Cleanup.
- Select the C Drive and click OK.
- The tool will calculate how much space you can free up.
- Check boxes like:
- Temporary Internet Files
- Recycle Bin
- Delivery Optimization Files
- Temporary Files
- Temporary Internet Files
- Click OK → Delete Files.
This built-in PC cleanup tool helps you remove junk files safely without deleting important system data.
Pro Tip: Click “Clean up system files” to remove even more unnecessary files, like old Windows updates and error reports.
Step 2: Use Storage Sense for Automatic Cleanup
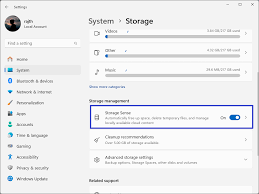
If you prefer automatic cleaning, Windows 11 includes a feature called Storage Sense. It automatically removes temporary files, Recycle Bin contents, and downloaded items you don’t need anymore.
To enable Storage Sense:
- Go to Settings → System → Storage.
- Toggle on Storage Sense.
- Click “Run Storage Sense now” or set it to clean up automatically.
You can set it to run daily, weekly, or monthly — so you never have to worry about manual cleanup again.
This feature acts as a free PC cleaner built right into Windows 11.
Step 3: Uninstall Unnecessary Programs
Old or unused programs can take up gigabytes of space on your C Drive. Removing them can instantly optimize your PC and improve speed.
How to uninstall apps:
- Open Settings → Apps → Installed apps.
- Scroll through the list and find software you no longer use.
- Click the three dots beside the app → select Uninstall.
You’ll be surprised how much space this simple step can free up.
If you’re unsure what’s safe to remove, use a PC cleaning software review to check which programs are safe to delete.
Step 4: Delete Temporary and Cache Files Manually
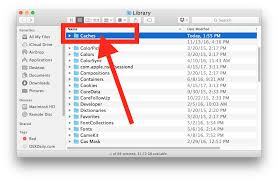
Temporary files are created when apps and Windows perform tasks. These build up over time and slow down your system.
To delete them manually:
- Press Windows + R, type %temp%, and press Enter.
- Select all files (Ctrl + A) and delete them.
- Repeat the same for C:\Windows\Temp.
This manual cleanup can remove hundreds of MBs or even GBs of unnecessary files.
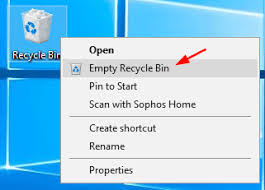
Step 5: Empty the Recycle Bin
Many users forget that deleting files doesn’t actually remove them — they just move to the Recycle Bin, still occupying C Drive space.
To empty it:
- Right-click on the Recycle Bin icon on your desktop.
- Click Empty Recycle Bin → confirm Yes.
This simple task can sometimes free up several gigabytes of space instantly.
Step 6: Move Large Files to Another Drive
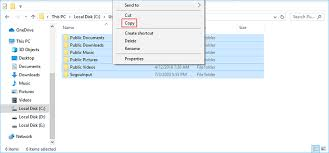
If you have a secondary drive (like D or E), move large files such as videos, games, or downloads there.
Steps:
- Open File Explorer → Go to your Downloads, Videos, or Documents folder.
- Right-click on large files → select Cut.
- Navigate to another drive → Paste.
This reduces pressure on your C Drive and keeps your system files separate from personal data.
Step 7: Clean Registry (Optional Step)
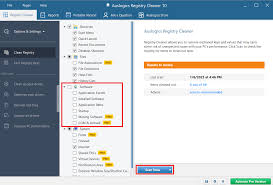
Over time, your system registry gets cluttered with old entries from uninstalled programs. Cleaning it can help optimize your PC and speed up Windows performance.
However, be cautious — manually editing the registry can harm your system if done incorrectly.
Instead, use a trusted PC clean software that safely performs registry cleaning.
Examples include:
- Pccleansoftware
- FileCleaner
- pCleaner 7
- Advanced SystemCare
These tools can clean up junk, repair registry errors, and optimize startup apps safely. Always check a PC cleaning software review before downloading any program.
Step 8: Use a PC Clean Software for Deep Cleaning

If you want an all-in-one solution, try a PC cleanup tool or best PC optimizer. These programs automatically remove junk, temporary files, browser cache, and registry clutter.
Advantages of PC cleaning software:
- Cleans hidden junk files safely
- Speeds up boot time
- Removes duplicate files
- Fixes registry issues
- Offers one-click optimization
Some popular and free PC cleaner tools include:
- FileCleaner – Real-time junk removal and browser cleanup
- pCleaner 7 – New generation tool for deep system cleaning
- CCleaner – Simple and effective junk file remover
These tools make Windows 11 optimization fast and effortless.
Step 9: Defragment or Optimize Your Drive
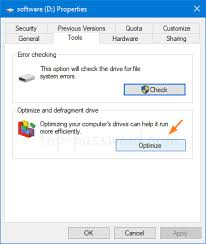
If your PC uses a traditional hard drive (HDD), defragmenting can help organize data and speed up file access.
Steps:
- Search Defragment and Optimize Drives in Start menu.
- Select C Drive → click Optimize.
If you use an SSD, Windows will automatically “trim” it instead of defragmenting — which also helps performance.
Step 10: Restart Your PC
Once you finish cleaning, restart your PC. This allows Windows to apply changes and run smoother.
You’ll notice faster startup times, better response speed, and improved overall performance.
Bonus Tips to Keep C Drive Clean
- Regularly empty Recycle Bin once a week.
- Use Storage Sense for automatic cleanup.
- Avoid saving large videos or downloads on the C Drive.
- Use cloud storage (like OneDrive or Google Drive) for backups.
- Schedule regular cleanups using your PC clean software.
Conclusion
Cleaning your C Drive in Windows 11 is one of the easiest ways to speed up your PC and keep it running like new.
By using built-in tools like Disk Cleanup and Storage Sense, or trusted third-party PC cleanup tools, you can remove junk files, free up storage, and optimize your computer in just a few minutes.
A clean system not only performs faster but also lasts longer — so make it a habit to clean your C Drive regularly.
Top 5 Frequently Asked Questions (FAQs)
1. How often should I clean my C Drive in Windows 11?
It’s best to clean your C Drive once every 2–3 weeks. Regular cleanup prevents junk files from piling up and helps your PC stay fast and smooth.
2. Is it safe to use PC cleaning software?
Yes, trusted PC clean software like FileCleaner, CCleaner, or pCleaner 7 are safe when downloaded from official websites. These tools safely remove junk files, clean the registry, and optimize your PC without harming system files.
3. What should I avoid deleting while cleaning the C Drive?
Avoid deleting files in Windows, Program Files, and System32 folders. These contain important system files. Stick to Disk Cleanup, Storage Sense, or a PC cleanup tool to stay safe.
4. Can cleaning the C Drive really speed up my PC?
Absolutely! Removing unnecessary files, clearing temporary data, and optimizing storage space can speed up your PC and improve overall Windows 11 performance.
5. What’s the best way to clean the registry safely?
Manually cleaning the registry is risky. It’s better to use a PC clean software or best PC optimizer that offers a safe registry cleaning feature. These tools automatically remove invalid entries without affecting your system.
Disclaimer
This article is for educational purposes only. Always back up your important data before deleting or modifying files on your computer. While built-in Windows tools and trusted PC cleaning software are generally safe, improper use or deletion of system files may cause errors. The author and publisher are not responsible for any data loss or system issues that may occur. Use all software tools and cleaning steps at your own discretion.